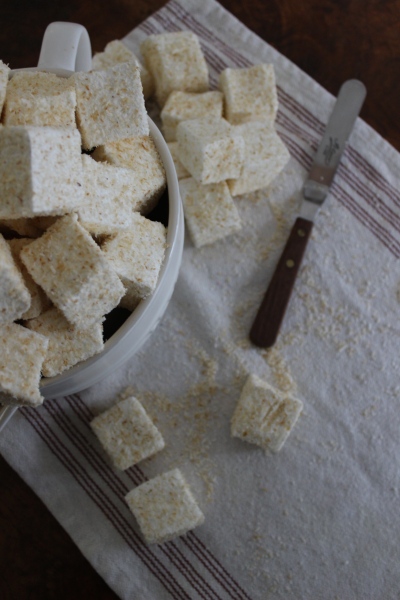
As a child I fondly remember mum stocking up on pink and white marshmallows (or marshies, as she calls them) for our Christmas holidays at our family beach cottage. Whether used to make rice krispy treats, the ever-so-popular s’mores, or simply toasted on the fire until gooey, the trusty marshmallow never lasted long in our household.
Marshmallows are near the top of my list of guilty pleasures. I still throw the odd ribbon of mallow fish and licorice-tailed mice into the shopping trolley during my weekly grocery shop. These, along with the mini’s in a cup of coco’ey hot chocolate are my go-to study treat.

Mum was quite the nifty birthday cake goddess in her day and made countless farmyard cakes. She used the toasted coconut marshies for hay bales. As coconut is a rather trendy ingredient at the moment, I thought I’d try my usual recipe for a toasted coconut version. Skill wise, these are super easy to make. However without the appropriate apparatus, you may find making these a little tricky. A sugar thermometer (Yuppiechef) and an electric mixer, with glass or metal bowl is essential for this recipe. It uses gelatin, which is the responsible for the mallows’ spongey texture. These marshies are super yum and are gluten and fat free!

My little helper – Cousin Noah !
You’ll need
22g gelatin powder
250g water
150g glucose syrup (can be bought from any pharmacy)
400g white sugar
3g salt
200g desiccated coconut

Method
- Dissolve gelatin with half of the water in a glass jug. This is referred to as ‘sponging’ and can be performed by gradually sprinkling the gelatin over the water until it absorbs the water. Leave to stand for 5 min. Place in the microwave for 2 x 10 s intervals until it is clear and syrup-like. Transfer mixture to a clean electric mixer.
- In a medium sized pot, combine the glucose syrup, sugar, salt and remaining water (125g) and stir. With the aid of a sugar thermometer, boil the mixture until 118°C (soft ball) is reached.
- Set the mixer on a low speed and gradual pouring the syrup down the walls of the bowl. Be careful as the syrup is very hot and can cause dreadful burns ! Once all the sugar syrup has been transferred, increase the speed of the mixture to high speed and beat for 8 min.
- Transfer mallow fluff into a greased 20 x 15 cm pan and leave to cool in the fridge for 4-6 h.
- Toast coconut in a pan over a low heat. I use two spatulas to mix and turn the coconut to prevent it from burning. Once toasted, spread coconut over a shallow oven tray to cool.
- Remove mallow block from the fridge and slice into small cubes with a sharp, greased knife. A non-serrated one works best. Coat mallows with coconut and store in an airtight container.
Makes 30
If you try my coconut homemade marshmallows, don’t forget to snap and share with #galoobrious
Xo
Emma

Pretty lighting – awaiting my editing software, which I hope to use for minor touch ups. Otherwise, this shot is completely raw and unedited.


Superb Emma!
LikeLiked by 1 person